
How to Design Your Own Dress Pattern
How to Design Your Own Dress Pattern

Things You’ll Need
-
Dress or shirt that fits you perfectly
-
Measuring tape
-
Washable marking pen
-
Wax paper
-
Pins
-
Tracing wheel
-
Sharp scissors
-
Permanent marker
-
Wrapping paper or freezer paper
-
Pattern weights (or drinking glasses)

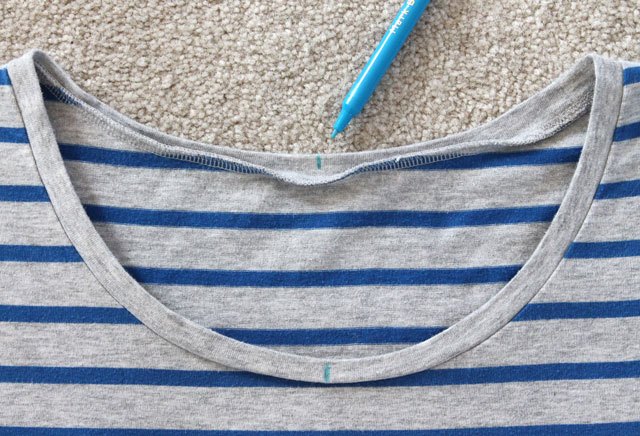
Step 1
Use a washable marking pen to mark the center back and front on the neckline.
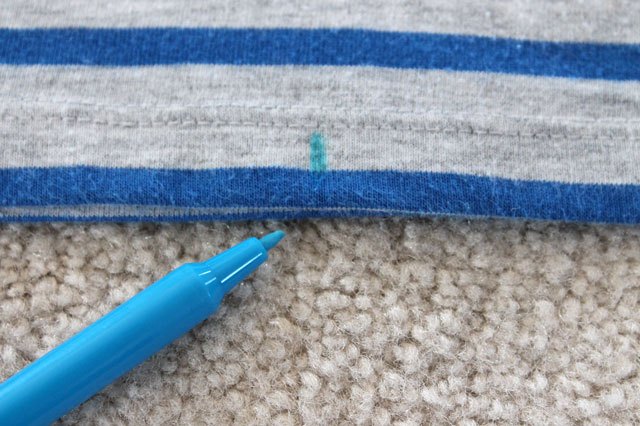
Step 2
Mark the center front and back on the hem of the dress with the washable marker.
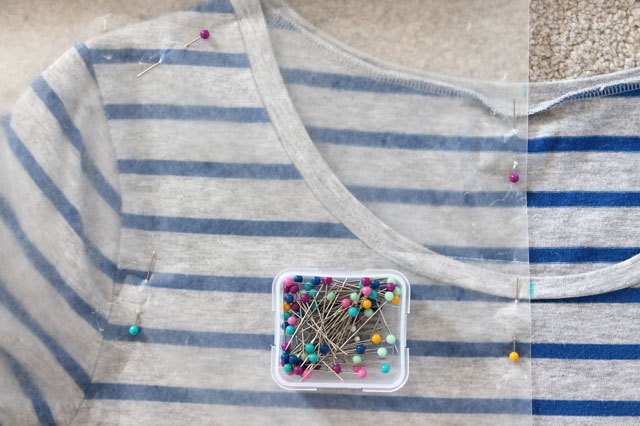
Step 3
Place a piece of wax paper over half of the front of the dress. Line up the edge of the paper with the center marks on the neckline and hem. Pin the paper in place. You don’t need to trace the entire front of the dress because you are creating a pattern piece that will be used on the fold.
Step 4
Use a tracing wheel to “draw” a line around the seams of the dress.
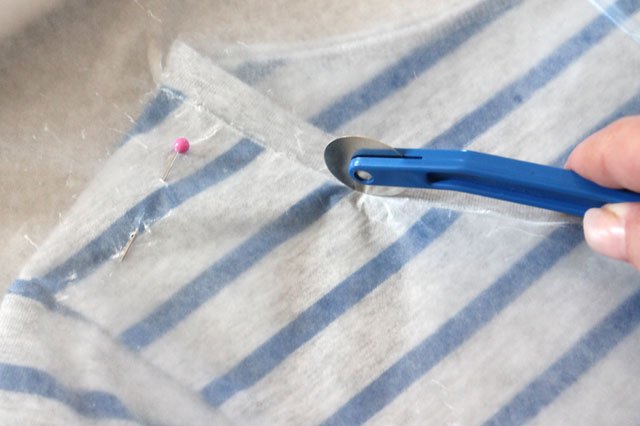
Step 5
Remove the pins, take the paper off the front of the dress and cut the wax paper along the lines you traced.
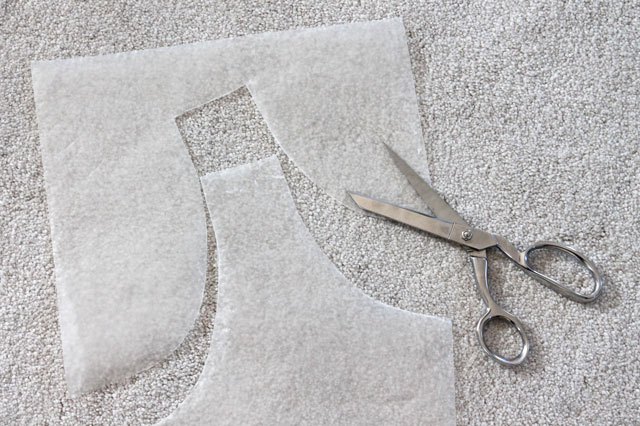
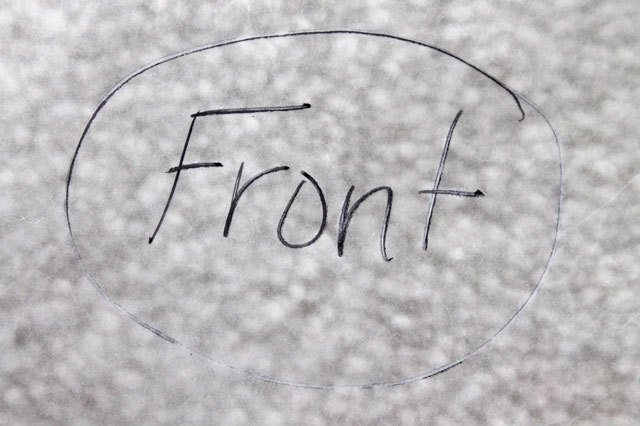
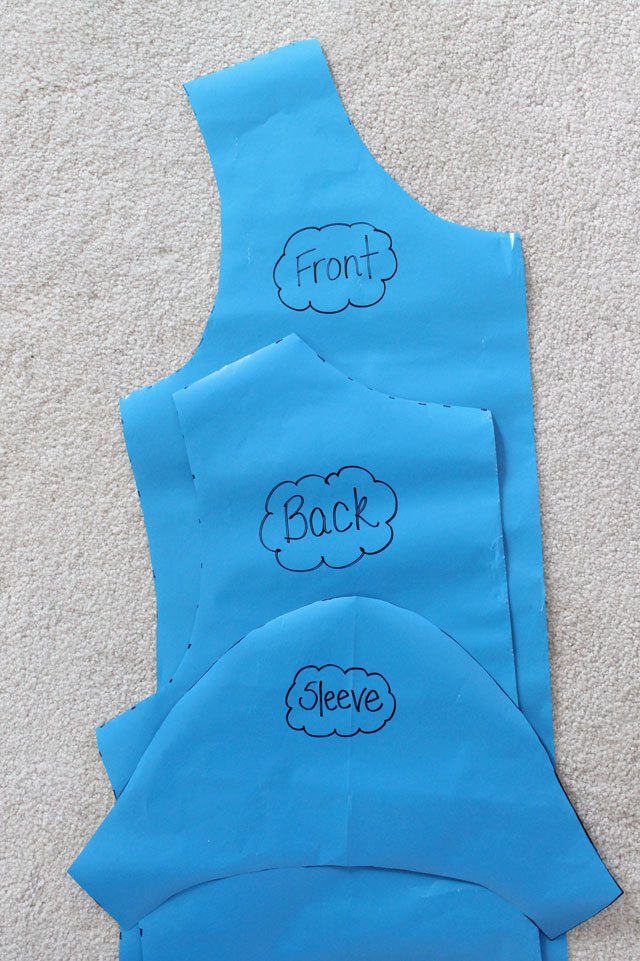
Step 6
Be sure to label each of the pieces of wax paper as you cut them out.
Step 7
Now turn the dress over so the back of the dress is facing up. Place the wax paper over half of the dress, lining up the center marks on the neckline and the hem. Pin the paper in place and trace over the seam lines of the dress with the tracing wheel. Remove the pins, cut the paper along the traced lines and label.

Step 8
Fold a piece of wax paper in half and place it over the sleeve with the fold along the top edge of the sleeve. Pin in place.

Step 9
Use the tracing wheel to trace over the armhole seam. Remove the pins, cut the paper along the traced lines and label.

Step 10
Place the wax paper pieces onto wrapping paper or freezer paper. Instead of pinning, you can use regular drinking glasses as pattern weights to hold the wax paper in place.

Step 11
To create the seam allowance on your pattern piece, use a measuring tape and a marker to mark 1/2 inch away from the wax paper pattern piece onto the wrapping paper. Continue marking around the entire pattern.

Step 12
Cut the wrapping paper along the lines you just marked.

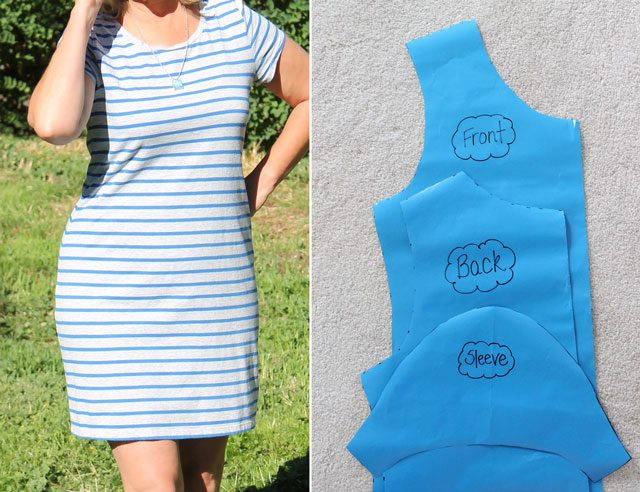
Use the pattern pieces to make a new dress that fits just like your favorite one, in every color for every season. Be sure to check out How to Add Sleeves to a Sleeveless Dress if you’d like to turn a summer dress into a fall or winter version.

Read more : http://www.ehow.com/how_6224930_design-own-dress-pattern.html
Source : http://www.ehow.com/how_6224930_design-own-dress-pattern.html