

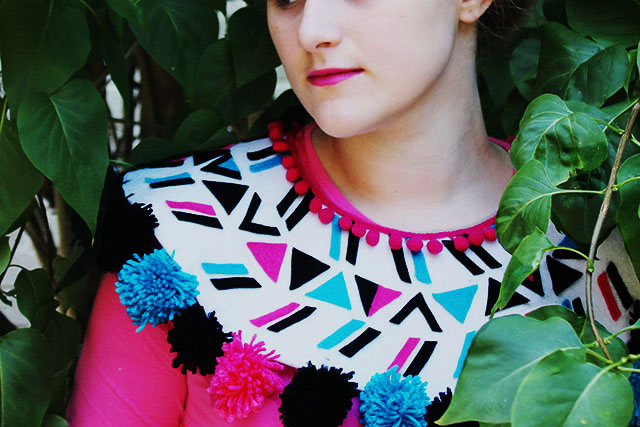
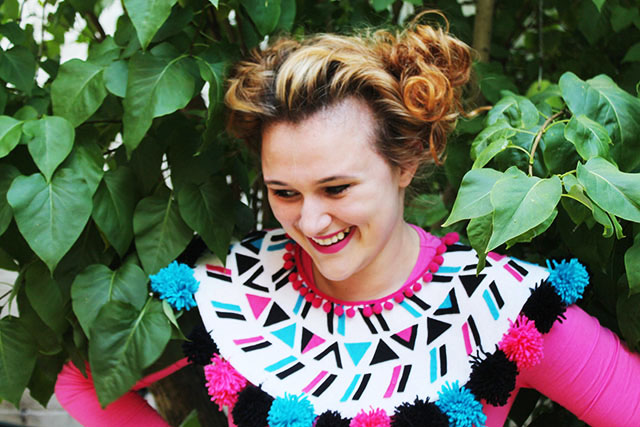
One of things that really excites me about summer fashion is the way that different cultural styles get re-appropriated and mixed to create an amazing eclectic jumble. Look around any festival and you’ll see Mexican, Native American and Asian influences all combining seamlessly to create fusion fashion. I love it! I wanted to create an accessory which would be easy to wear and add on but have the appearance of defining the outfit. Roll up, roll up for the amazing statement pompom collar!
You will need:
1 metre of thick white felt or another no fraying fabric
Colourful felt
Colourful wool
Pompom Trim
Pins
Scissors
Tape Measures
A sewing machine or a needle and thread
Fabric glue
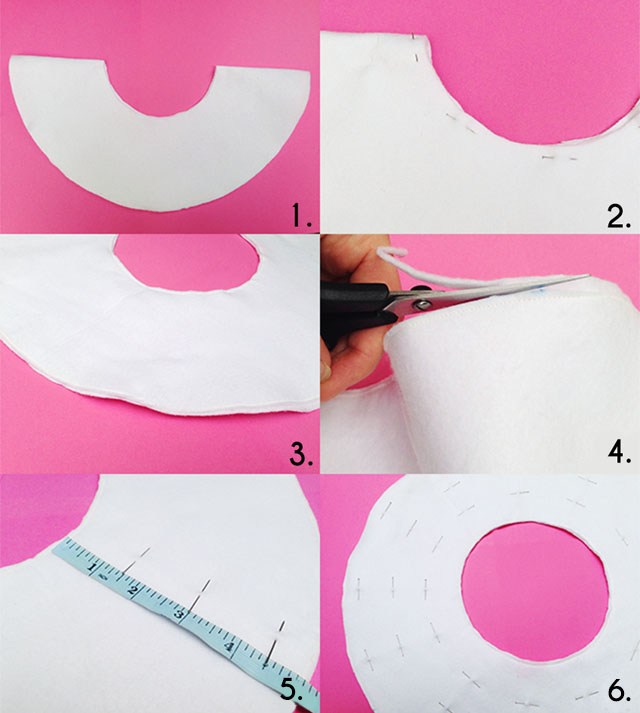
1. Measure the length of your shoulder span and then cut out two circles from your felt with this length as your diagram. Cut out a small circle in the middle and check that your head fits through.
2. Pin the two circles together.
3. Using the sewing machine sew your felt together to create a strong base.
4. Trim the edges.
5. Take your tape measure and lay it across the radius of your collar. You’re going to want to divide you collar into rows so that your pattern will look regular. I decided on 1 inch increments. Put a pin at every inch.
6. Rotate your collar a little and do the same. Keep going until your entire collar is divided into rows and you have a marker on where to place your pattern.
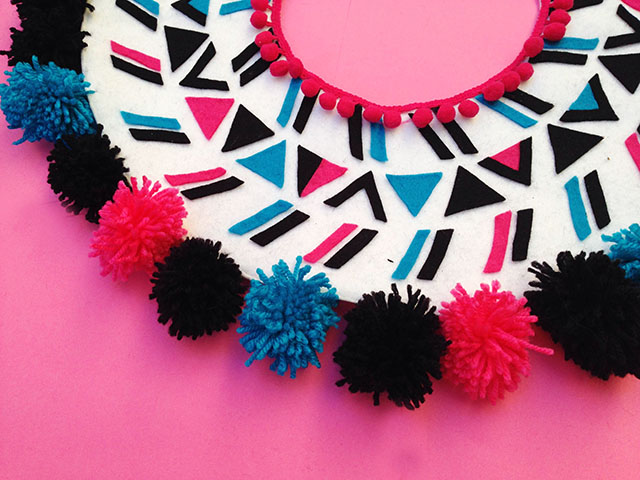
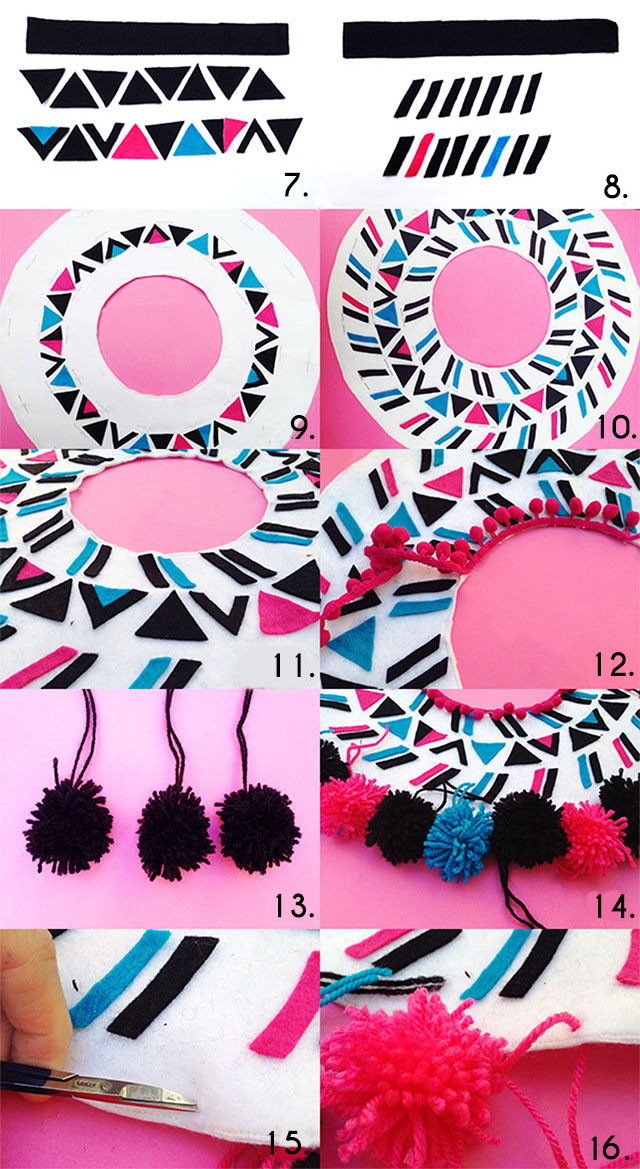
7. To create a triangle pattern, take a stripe of black felt and cut it diagonally into triangles. To make my pattern a little more interesting I divided some of my triangles in half or placed smaller triangles within them
8. To create a line pattern, take a strip of black felt and cut it diagonally. I then mixed colourful lines in with the plain black.
9.Start with your triangle patter in your middle row and place your felt square until you have the right spacing and colour mix.
10. Once you are happy with your middle row move onto the outer rows. I think it looks good to have the lines pointing in opposing directions.
11, Now glue down your shapes and remove your guide pins.
12. Glue the pompom trim around the neck hole and wait to dry.
13. Create pompoms out of your yarn. Make sure they have long tails as you will be tying them on.
14. Position your pompoms around the edge to check for spacing and colour.
15. Using some sharp scissors create a small hole where ever you want a pompom.
16. Pass the tails of the pompom through the hole, tie off and trim down the excess.

